If you’ve ever dealt with a brake issue or changed your brake pads, chances are you’ve encountered the need to reset your brake caliper pistons. These vital components of your braking system can become compressed or stuck over time, leading to uneven braking and potentially unsafe driving conditions.
In this comprehensive guide, we’ll dive deep into the world of brake caliper pistons, explain the importance of resetting them, and give you a step-by-step approach to how to do it yourself. This article is designed to be informative and engaging, capturing your attention while giving you the expertise needed to tackle the task at hand. So, let’s get started!
A Brief Overview
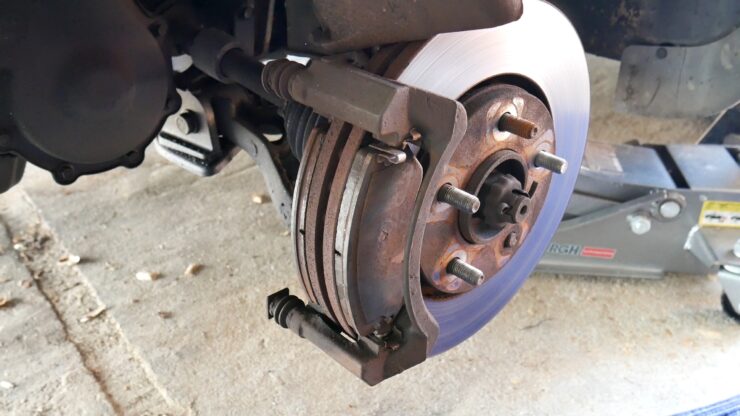
Brake caliper pistons are an essential part of your vehicle’s disc braking system. They’re responsible for applying pressure to the brake pads, which in turn create friction against the brake rotors, ultimately slowing down your vehicle. The pistons are housed within the brake caliper assembly and are subject to wear and tear over time.
When to Reset Brake Caliper Pistons
Resetting brake caliper pistons is a necessary maintenance task that should be performed when:
- Replacing brake pads
- Servicing or replacing brake calipers
- Experiencing uneven braking or a spongy brake pedal
- Flushing or bleeding your brake fluid
Tools and Materials Needed
Before you begin, make sure you have the following tools and materials on hand:
- Vehicle owner’s manual
- Jack and jack stands
- Lug wrench
- Socket wrench and appropriate sockets
- C-clamp, brake caliper spreader, or channel lock pliers
- Brake cleaner
- Shop towels or rags
- Brake fluid (if necessary)
- New brake pads (if necessary)
Safety Precautions
Before diving into the resetting process, follow these safety precautions to protect yourself and your vehicle:
- Park your vehicle on a flat, level surface and engage the parking brake.
- Wear safety glasses and gloves to protect your eyes and hands.
- Use a well-ventilated area, as brake cleaner and brake fluid fumes, can be harmful.
- Do not attempt this task if you’re uncomfortable or unsure about your abilities. Consult a professional mechanic instead.
Step-by-Step Guide to Resetting Brake Caliper Pistons
Step 1: Loosen the Lug Nuts

Before jacking up your vehicle, use a lug wrench to slightly loosen the lug nuts on the wheel with the caliper you’ll be working on.
Step 2: Lift the Vehicle
Using a jack and jack stands, safely lift the vehicle according to the manufacturer’s instructions in your owner’s manual. Once lifted, remove the lug nuts and wheel.
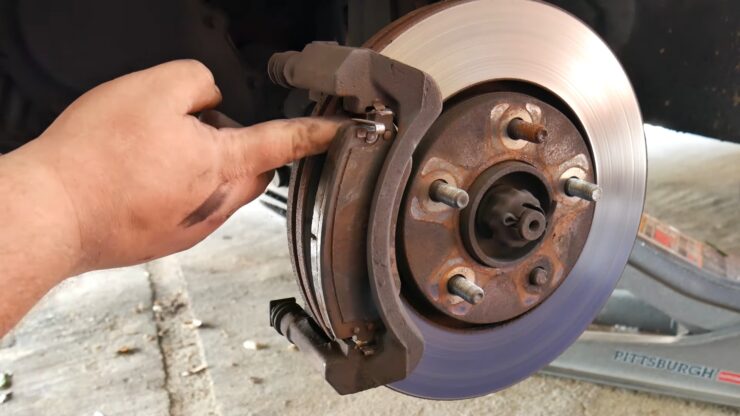
Step 3: Locate and Remove the Brake Caliper
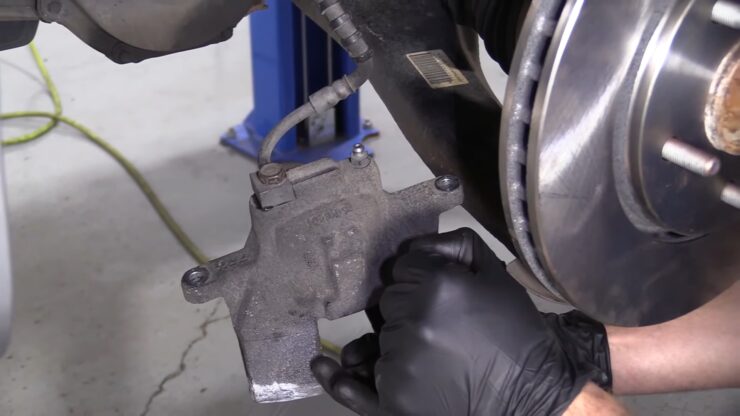
Find the brake caliper assembly and use a socket wrench to remove the bolts holding it in place. Carefully slide the caliper off the brake rotor.
Step 4: Inspect the Brake Pads
Check the brake pads for wear and replace them if necessary.
Step 5: Reset the Piston
Using a C-clamp, brake caliper spreader, or channel lock pliers, carefully compress the piston back into the caliper. This will create enough space for the new brake pads or ensure the piston is functioning properly.
Step 6: Clean and Inspect the Caliper
Clean the brake caliper assembly with brake cleaner, focusing on the piston and surrounding areas. Inspect the caliper for any signs of damage or excessive wear. If you notice any issues, consider replacing the entire caliper assembly.
Step 7: Reinstall the Brake Caliper

Slide the caliper back onto the brake rotor and align the mounting holes. Secure it in place with the bolts you removed earlier, tightening them to the manufacturer’s recommended torque specifications.
Step 8: Bleed the Brake System (Optional)
If you opened the brake fluid reservoir or suspect air has entered the system, bleed the brake system to ensure optimal performance. Consult your owner’s manual for the specific bleeding procedure for your vehicle.
Step 9: Reinstall the Wheel
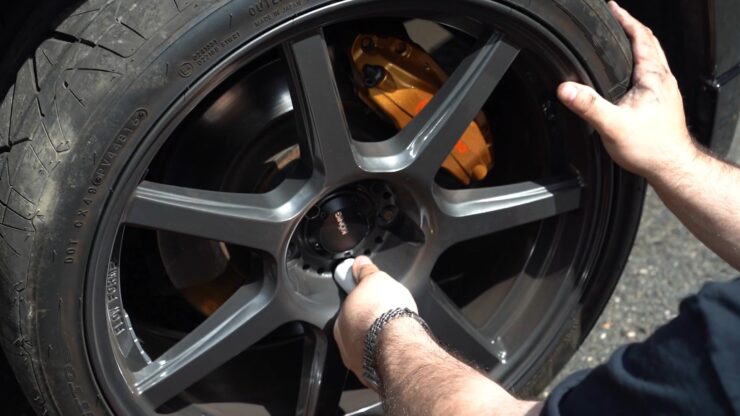
Place the wheel back onto the hub and hand-tighten the lug nuts. Lower the vehicle back to the ground, and then use a torque wrench to tighten the lug nuts to the manufacturer’s recommended specifications.
Step 10: Test Drive
Before hitting the road, pump the brake pedal several times to ensure proper pressure. Then, take your vehicle for a test drive to ensure the brakes are functioning correctly and that the brake pedal feels firm and responsive.
Troubleshooting Tips
If you experience difficulties while resetting the brake caliper piston or notice ongoing issues after completing the process, consider the following troubleshooting tips:
- Check for seized or damaged pistons: If the piston is difficult to compress or shows signs of damage, you may need to replace the entire caliper assembly.
- Inspect the brake hoses and lines: Damaged or blocked brake hoses can restrict fluid flow, affecting piston performance. Replace any damaged components as necessary.
- Evaluate the brake fluid: If your brake fluid is discolored or contaminated, flush and replace the fluid to ensure proper system performance.
Maintenance Tips
Regular Brake System Inspections
One of the most critical aspects of brake system maintenance is regularly inspecting the various components for signs of wear or damage. It’s essential to visually inspect your brake pads, rotors, calipers, and brake lines every few months or as recommended by your vehicle’s manufacturer. Identifying and addressing issues early on can prevent more significant, costly problems down the road and ensure your vehicle remains safe to operate.
Brake Fluid Checks and Replacement
Brake fluid is the lifeblood of your braking system. It’s responsible for transferring hydraulic pressure from the master cylinder to the calipers, allowing your vehicle to stop effectively. Over time, brake fluid can degrade and become contaminated, leading to reduced braking performance.
To maintain optimal braking, check your brake fluid levels regularly and replace the fluid as recommended by your vehicle’s manufacturer, typically every two years or 20,000 miles.
Brake Pad Replacement
Brake pads are consumable components that wear down over time due to the friction generated during braking. Worn brake pads can compromise your vehicle’s stopping power and damage the brake rotors.
To prevent this, it’s essential to replace your brake pads before they become excessively worn. Many brake pads feature a built-in wear indicator that will emit a high-pitched squeal when it’s time for a replacement. As a general rule of thumb, consider replacing your brake pads every 30,000 to 70,000 miles, depending on your driving habits and the type of pads used.
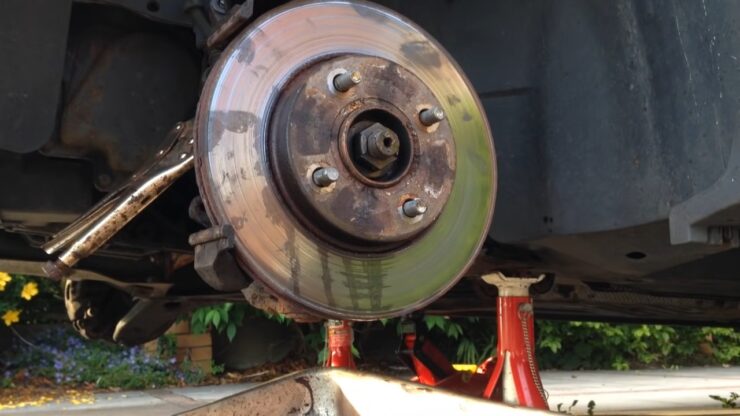
Brake Rotor Maintenance
Brake rotors are the metal discs that your brake pads press against to slow your vehicle down. Over time, rotors can develop uneven wear, warping, or grooving, which can lead to decreased braking performance and increased stopping distances.
To maintain optimal braking, it’s important to periodically inspect your brake rotors for signs of wear or damage. In some cases, rotors can be resurfaced to restore their smooth, even surface. However, if the rotors are worn beyond their minimum thickness or show significant signs of warping, they should be replaced.
Maintaining Caliper Functionality
The brake calipers house the pistons that apply pressure to the brake pads, playing a critical role in your vehicle’s braking system. Over time, calipers can seize due to corrosion, dirt, or worn seals, leading to uneven braking and potentially damaging other components.
To maintain proper caliper functionality, it’s essential to clean and lubricate the caliper slide pins and inspect the caliper seals for damage during brake pad replacement or other routine maintenance tasks. If you notice any signs of caliper seizure or damage, it’s important to address the issue promptly, either by repairing or replacing the affected caliper.
Final Words
Resetting brake caliper pistons is a crucial maintenance task that keeps your vehicle’s braking system functioning safely and efficiently. By following this comprehensive guide, you’ll gain the knowledge and confidence to tackle this essential task yourself, saving time and money while ensuring your vehicle remains roadworthy.
Remember, always prioritize safety and consult a professional mechanic if you’re unsure about any aspect of the process. With the proper tools, materials, and step-by-step guidance, you’ll be well-equipped to reset your brake caliper pistons and keep your vehicle in top-notch condition.